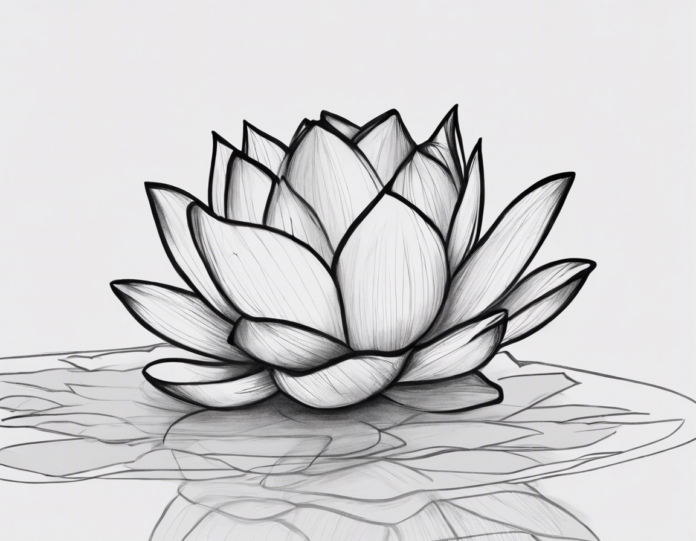
Drawing a lotus flower can be a truly meditative and rewarding experience. The lotus has deep spiritual symbolism in various cultures, representing purity, beauty, and enlightenment. Artists throughout history have been captivated by its elegance and intricacy, making it a popular subject in art across different mediums.
In this comprehensive guide, we will explore step-by-step instructions on how to draw a lotus flower, focusing on its intricate petals, the symmetry of its structure, and capturing the essence of tranquility it radiates. Whether you are a beginner looking to improve your drawing skills or an experienced artist wanting to add a new subject to your repertoire, this guide will provide you with the necessary tools and techniques to master the art of drawing a lotus flower.
Materials Needed:
Before starting your lotus flower drawing, make sure you have the following materials at hand:
- Drawing paper
- Pencil (preferably a mechanical pencil for precision)
- Eraser
- Fine-tip black pen or marker
- Colored pencils or watercolors (optional)
- Compass (for creating perfect circles)
Step 1: Sketching the Basic Shape
Begin by lightly sketching a circle in the center of your paper. This circle will serve as the core of the lotus flower. Next, draw a curved line extending from the circle as the guide for the first petal. Repeat this step to outline the basic shape of each petal around the central circle. Remember, lotus flowers typically have 8 petals, but you can adjust the number according to your preference.
Step 2: Adding Detail to the Petals
Once you have the outline of the petals, add more detail by creating gentle curves and creases on each petal. Lotus petals are known for their delicate and smooth texture, so try to capture that softness in your lines. Make sure the petals are even in size and shape to achieve a balanced look.
Step 3: Refining the Petals
Refine the shape of each petal by smoothing out the edges and adding a sense of flow to the overall composition. Pay attention to the curves and symmetry of the petals to create a realistic representation of a lotus flower. Erase any unnecessary guidelines and clean up your sketch to prepare for the next step.
Step 4: Adding Details to the Center
Focus on the center of the lotus flower by drawing a smaller circle within the central circle. This will represent the seed pod of the lotus. Add intricate details like stamens or pollen grains radiating from the center to give your drawing a more lifelike appearance. Take your time with this step, as the center is a prominent feature of the lotus flower.
Step 5: Inking Your Drawing
Once you are satisfied with the sketch, carefully ink over the final lines with a fine-tip pen or marker. Use deliberate and confident strokes to outline the petals, center, and other details of the lotus flower. Allow the ink to dry before erasing any remaining pencil marks to reveal a clean and polished drawing.
Step 6: Adding Color (Optional)
If you prefer a colored lotus flower, you can use colored pencils or watercolors to bring your drawing to life. Choose shades that reflect the natural hues of lotus flowers, such as pink, white, or even blue for a creative twist. Use light layers of color to build up depth and dimension in your artwork, focusing on highlighting the shadows and highlights to create a realistic effect.
Step 7: Final Touches
To complete your lotus flower drawing, take a moment to add any final touches or details that will enhance the overall composition. Consider adding a subtle background to frame the flower or incorporating additional elements like lily pads or water droplets to elevate the visual interest of your artwork.
Tips for Drawing a Realistic Lotus Flower:
- Study reference images of lotus flowers to grasp their intricate details and anatomy.
- Practice drawing individual petals to master their shapes and textures.
- Experiment with different drawing techniques, such as shading and hatching, to add depth to your artwork.
- Take breaks during the drawing process to avoid fatigue and maintain focus on the intricate details of the lotus flower.
Conclusion:
Drawing a lotus flower is not only a creative endeavor but also a calming and meditative practice. By following these step-by-step instructions and incorporating your artistic flair, you can master the art of drawing this symbol of purity and beauty. Remember to practice regularly, seek inspiration from nature, and enjoy the process of creating your own unique interpretations of the timeless lotus flower.
Frequently Asked Questions (FAQs)
Q1: Can I draw a lotus flower without prior drawing experience?
A1: Absolutely! Drawing a lotus flower can be a beginner-friendly project, especially with the step-by-step guide provided. Just take your time and practice your drawing skills.
Q2: What is the significance of a lotus flower in different cultures?
A2: The lotus flower holds various symbolic meanings across cultures, representing purity, enlightenment, beauty, and spiritual growth.
Q3: How can I make my lotus flower drawing more realistic?
A3: To make your lotus flower drawing more realistic, pay attention to details, study the flower's anatomy, and focus on light and shadow to create depth.
Q4: Can I add my own creative twist to the traditional lotus flower drawing?
A4: Absolutely! Feel free to experiment with colors, compositions, and additional elements to personalize your lotus flower drawing and make it unique.
Q5: What techniques can I use to add depth and dimension to my lotus flower drawing?
A5: Techniques such as shading, hatching, and blending can help add depth and dimension to your lotus flower drawing, making it more realistic and visually appealing.

